How to get started with AccountEdge Connect and Zapier
Here is a list of Triggers and Actions available with AccountEdge Connect:
Triggers:
Customer - When a new Customer is created
Update Customer - When a Customer record is updated
Lead - When a new Lead is created
Update Lead - When a Lead record is updated
Vendor - When a new Vendor is created
Update Vendor - When a Vendor record is updated
Sale Order & Quote - When a new Sales Order or Quote is created
Sale Invoice - When a new Sales Invoice is created
Purchase Order - When a new Purchase Order is created
Actions:
Create Customer
Create Vendor
Update Customer
Update Vendor
Search Customer
Search Vendor
Getting started is easy, follow these steps:
Step 1
Sign up for a Zapier account, then log in and select Create Zap from the Dashboard.
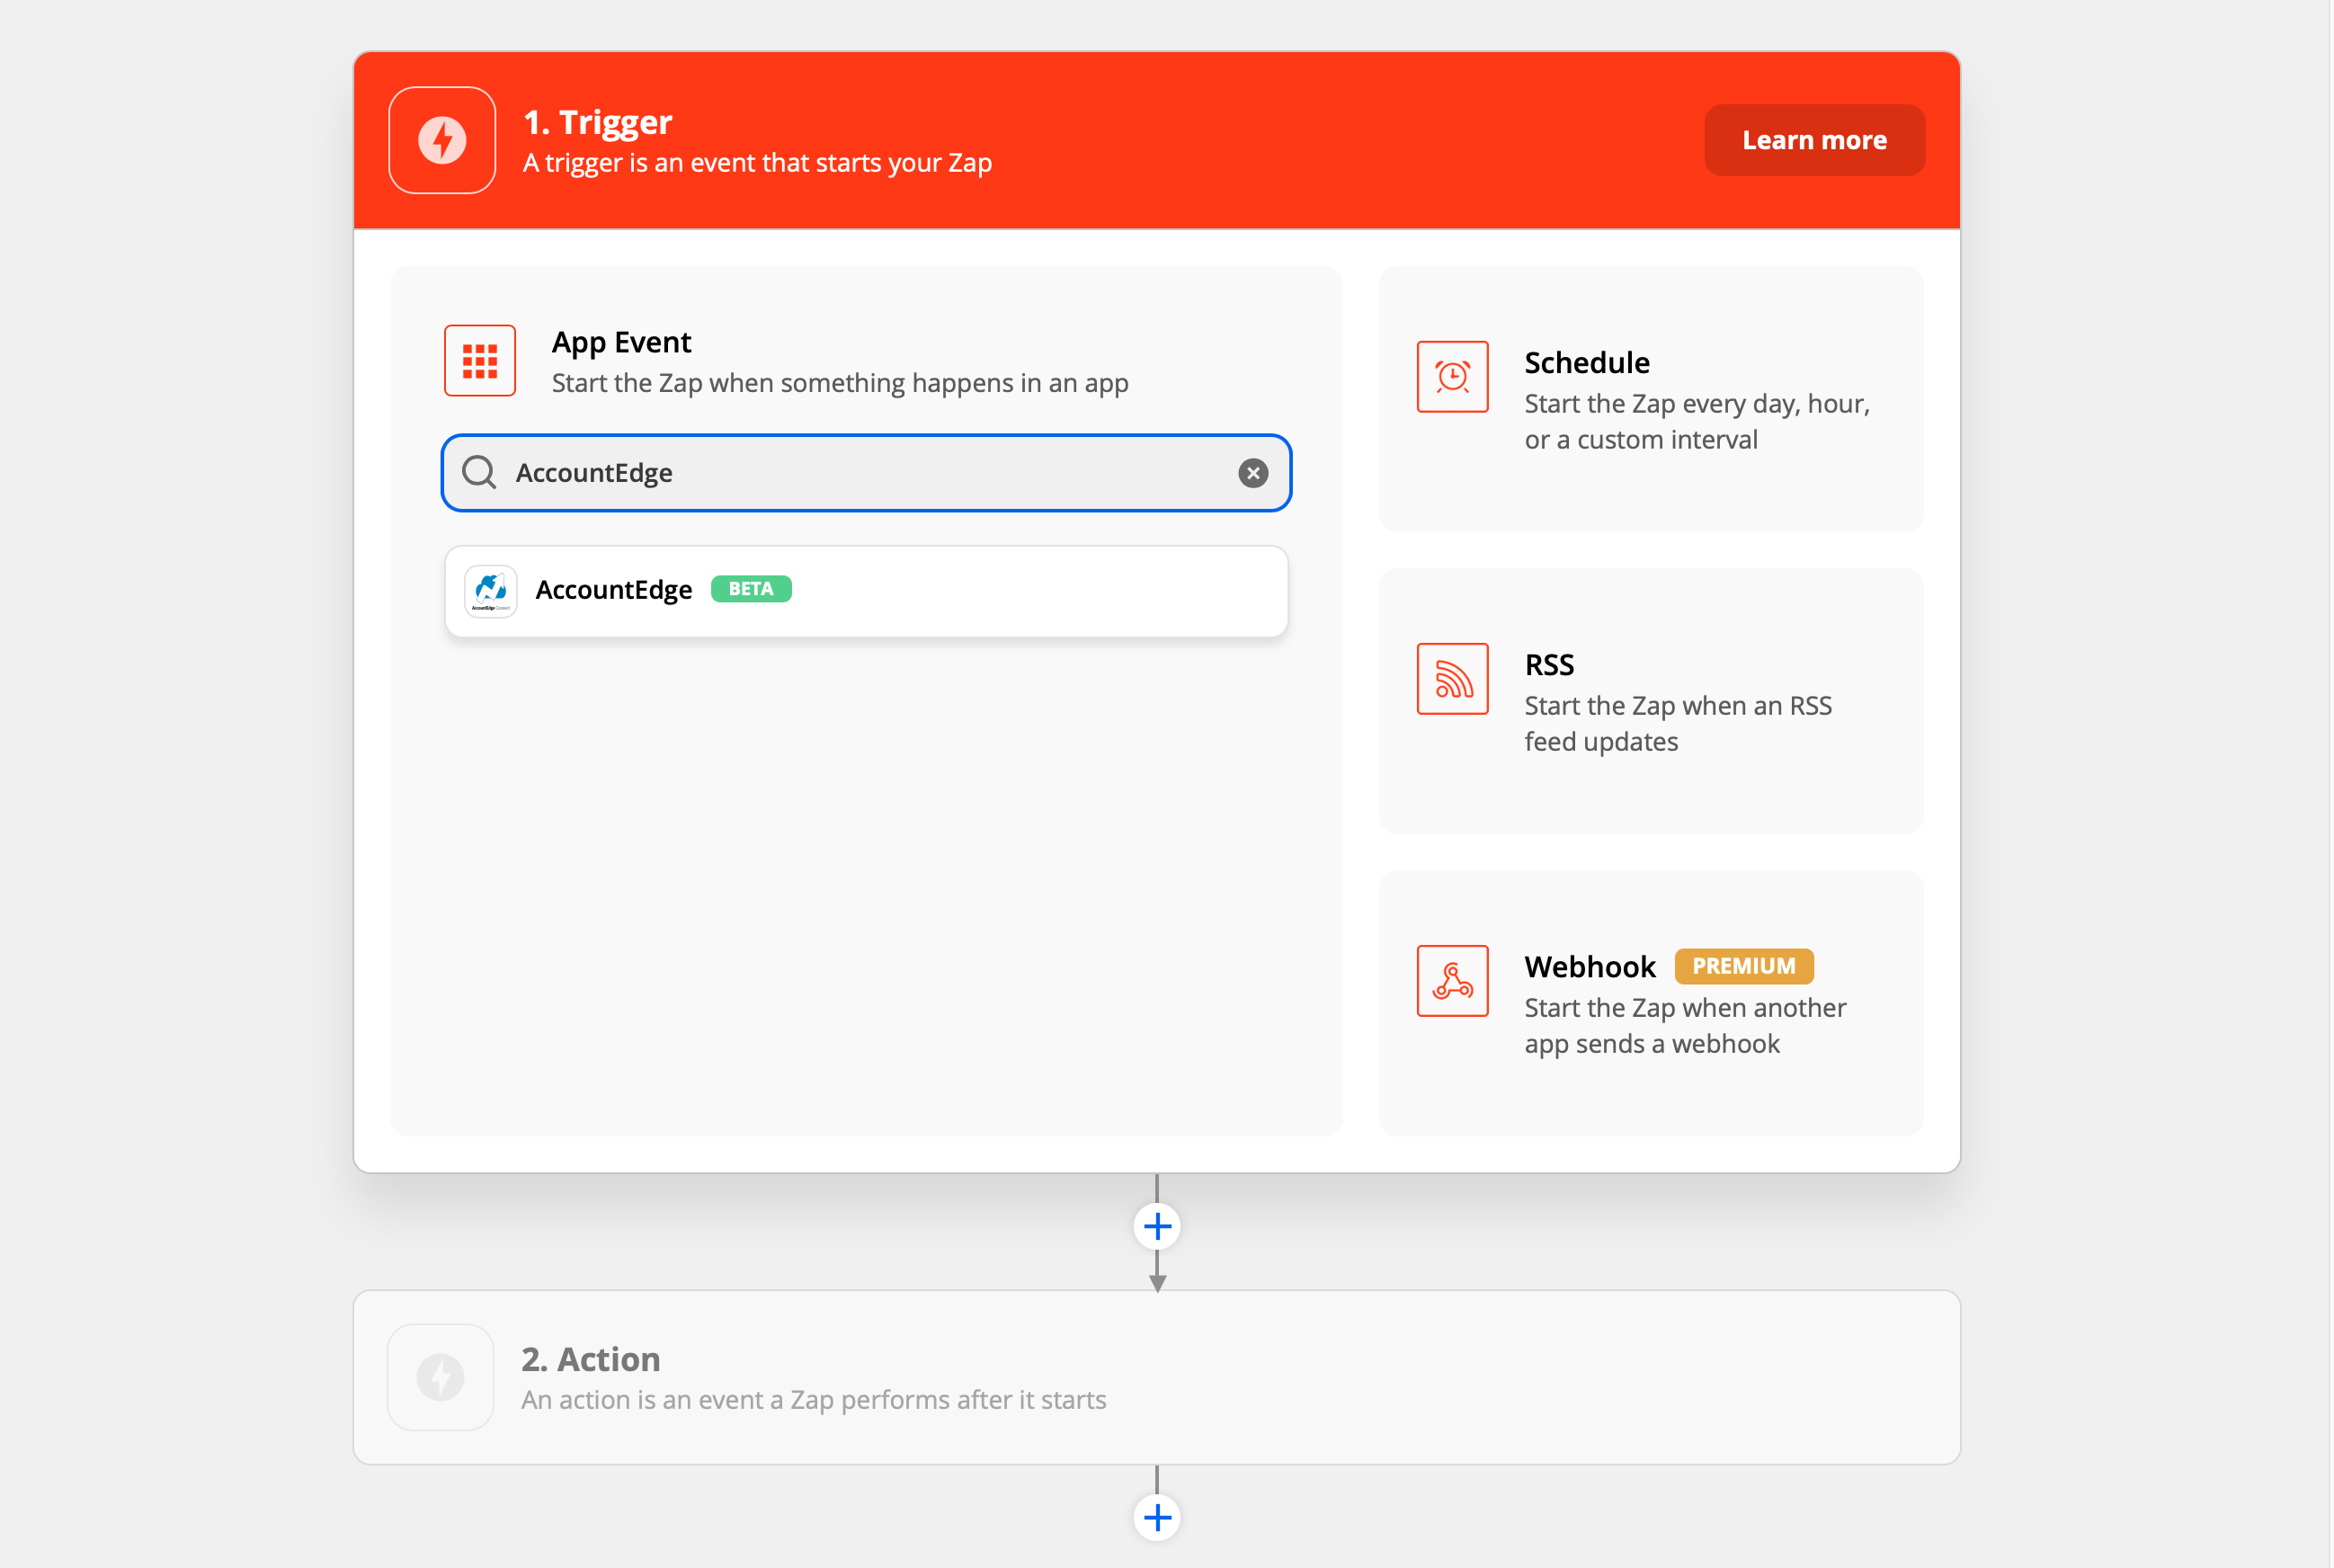
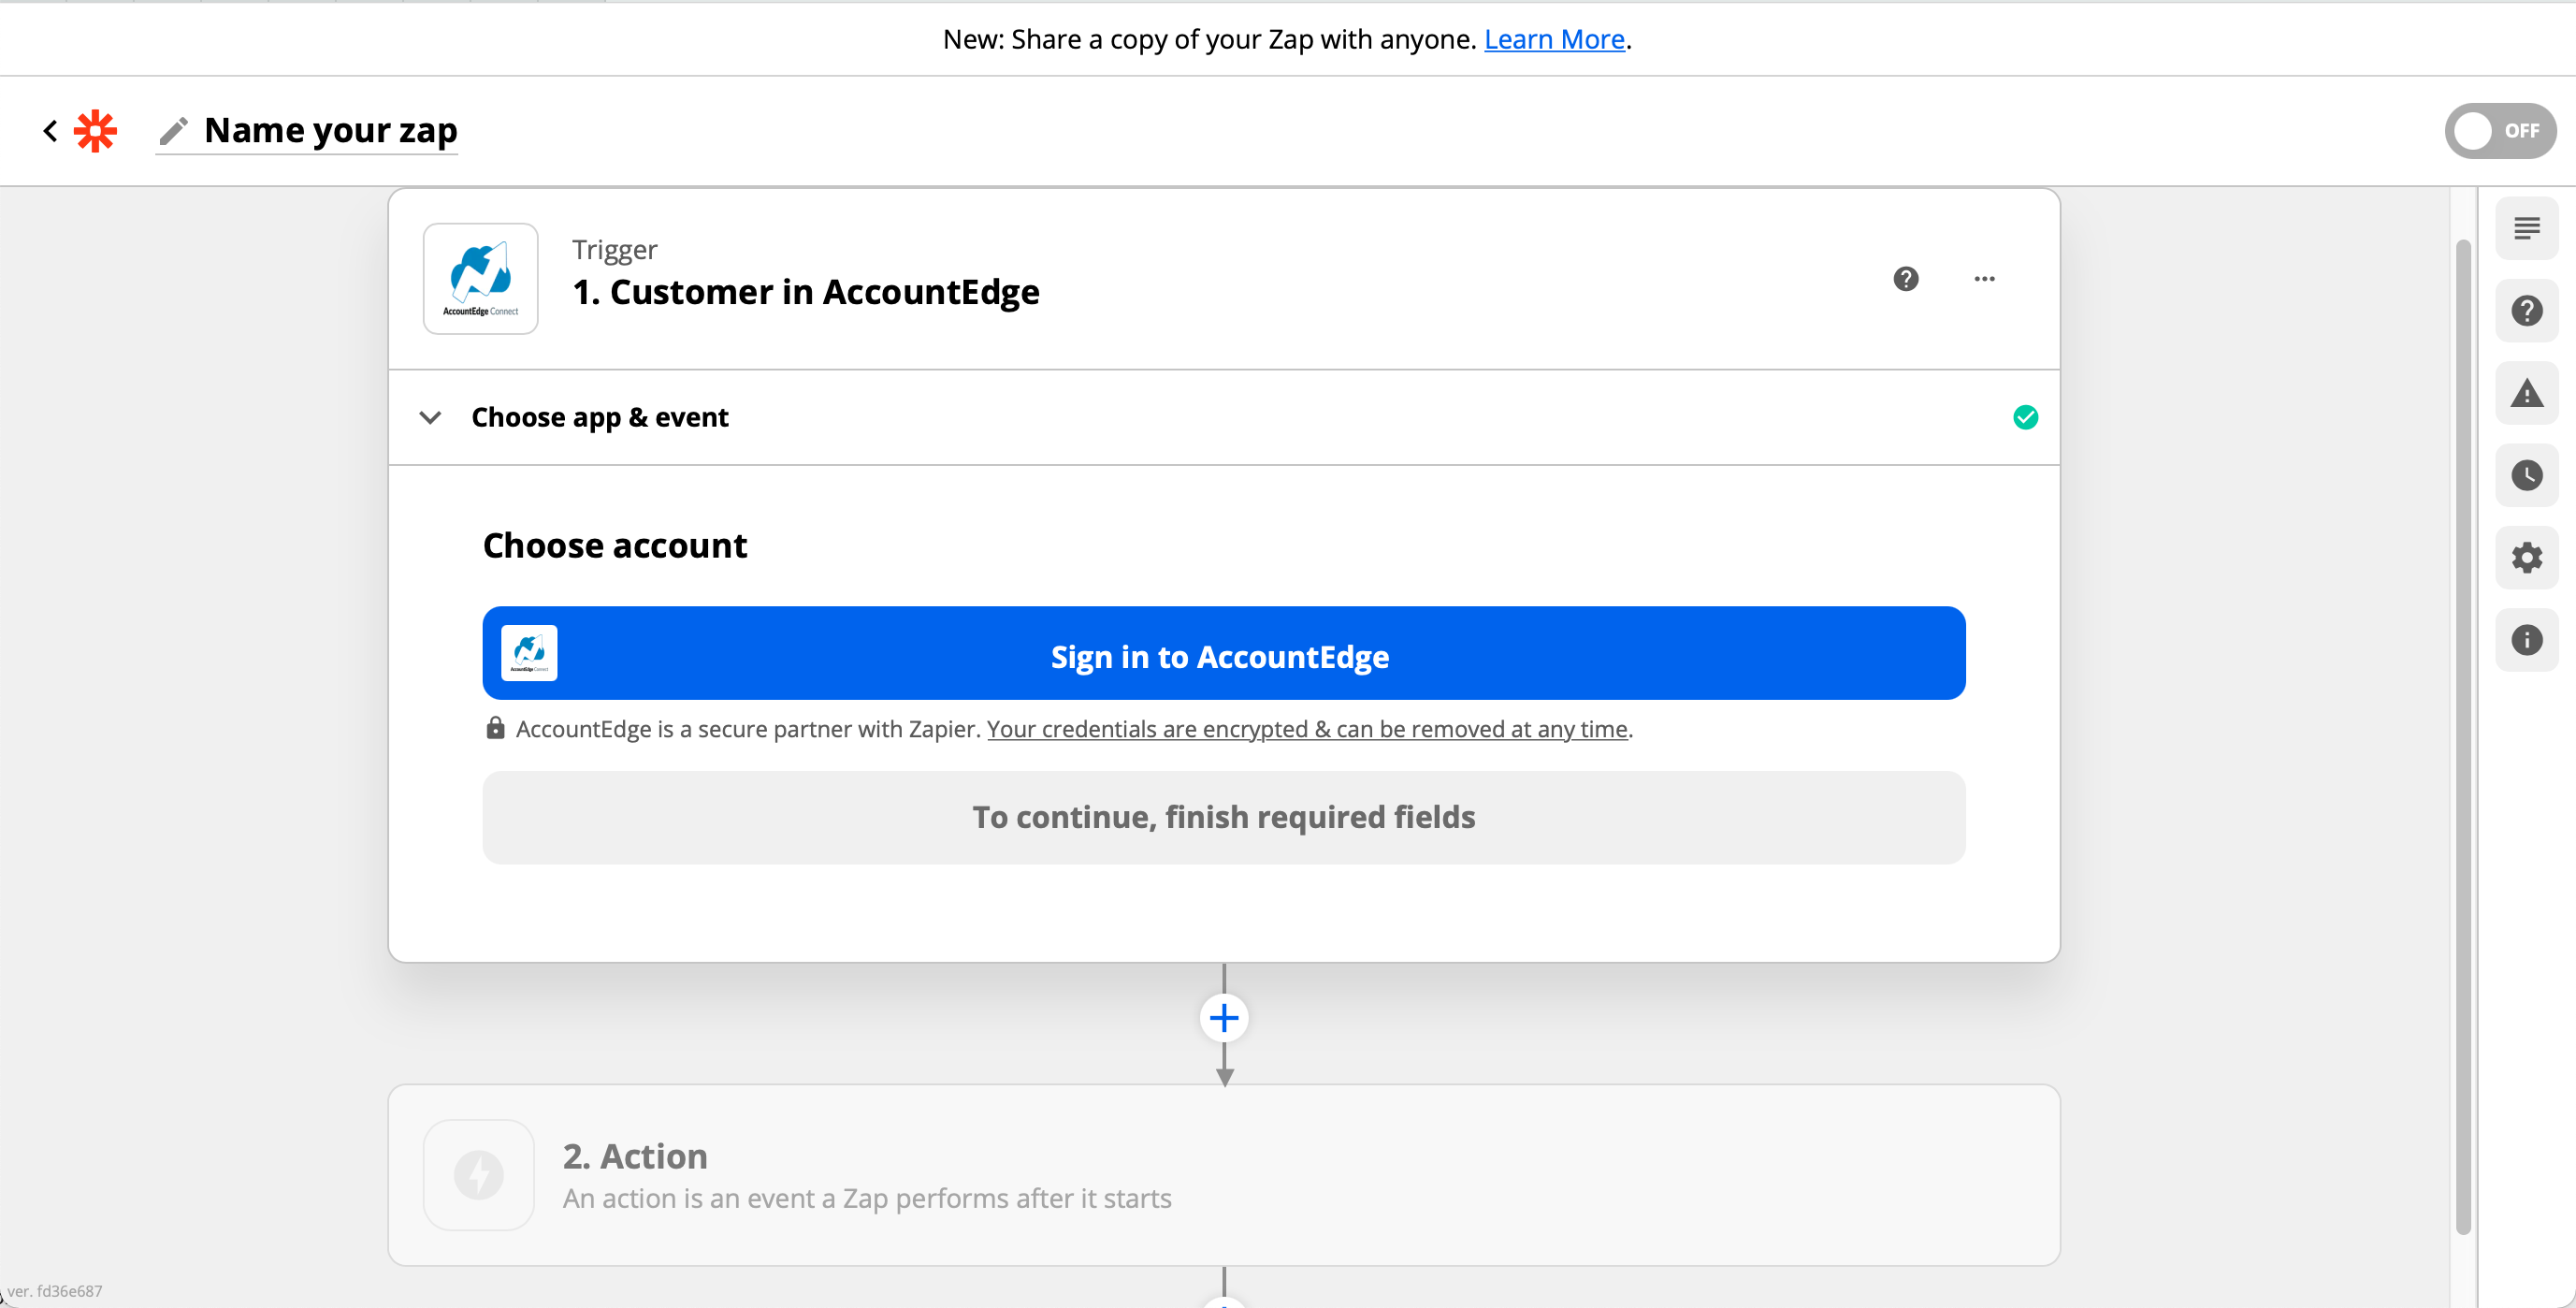
Step 2
Define your Trigger (an event that starts your Zap) by Searching apps for AccountEdge and selecting it.
Step 3
Choose an event from the dropdown, for example “Customer” (triggers when a new customer is added). This is what starts the Zap. Select Continue.
Step 4
Select Continue and Sign into AccountEdge.
Step 5
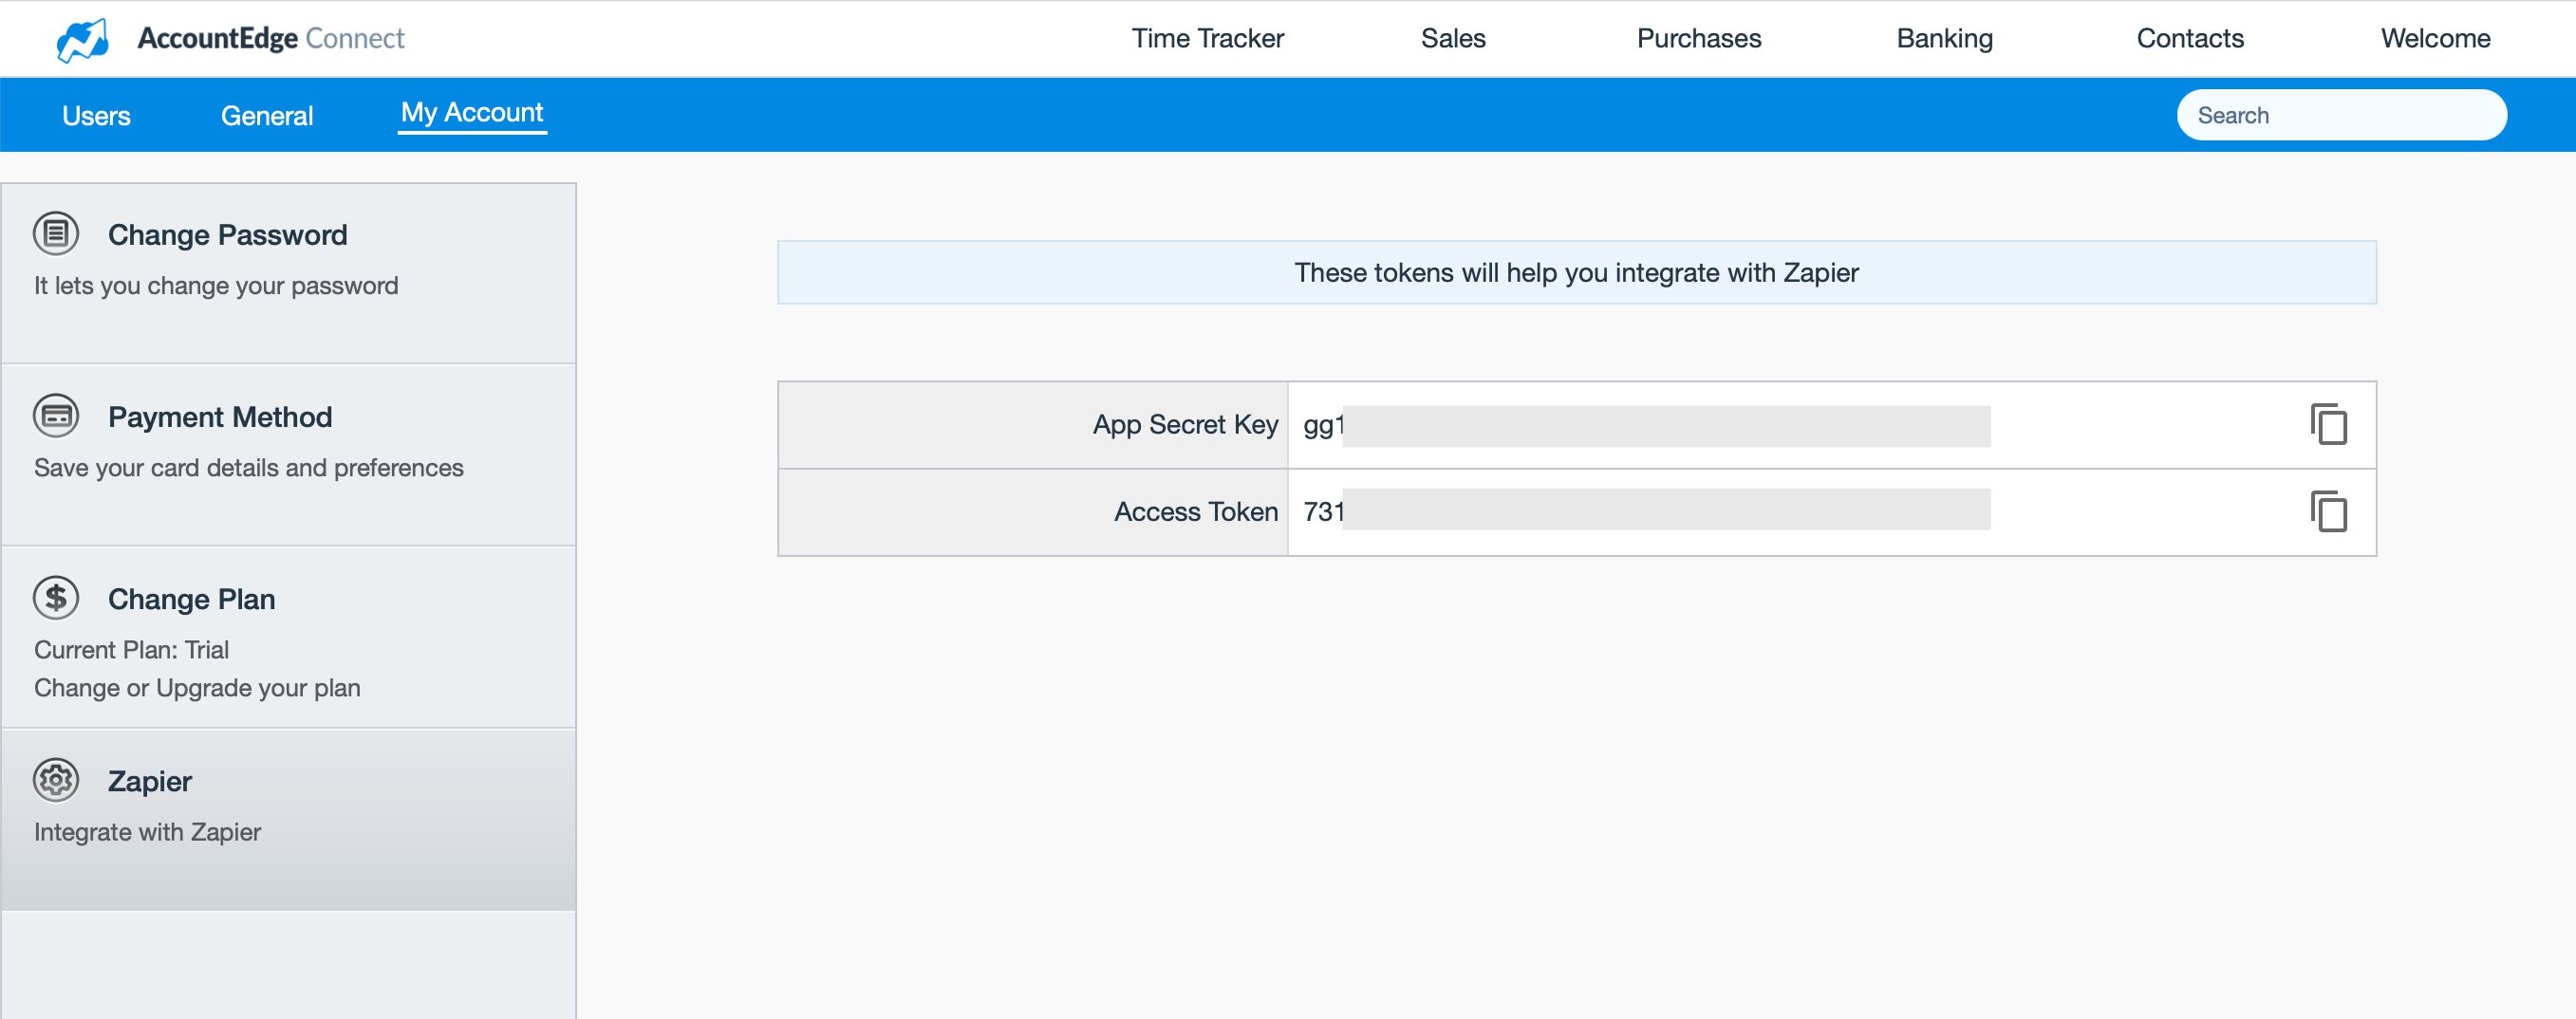
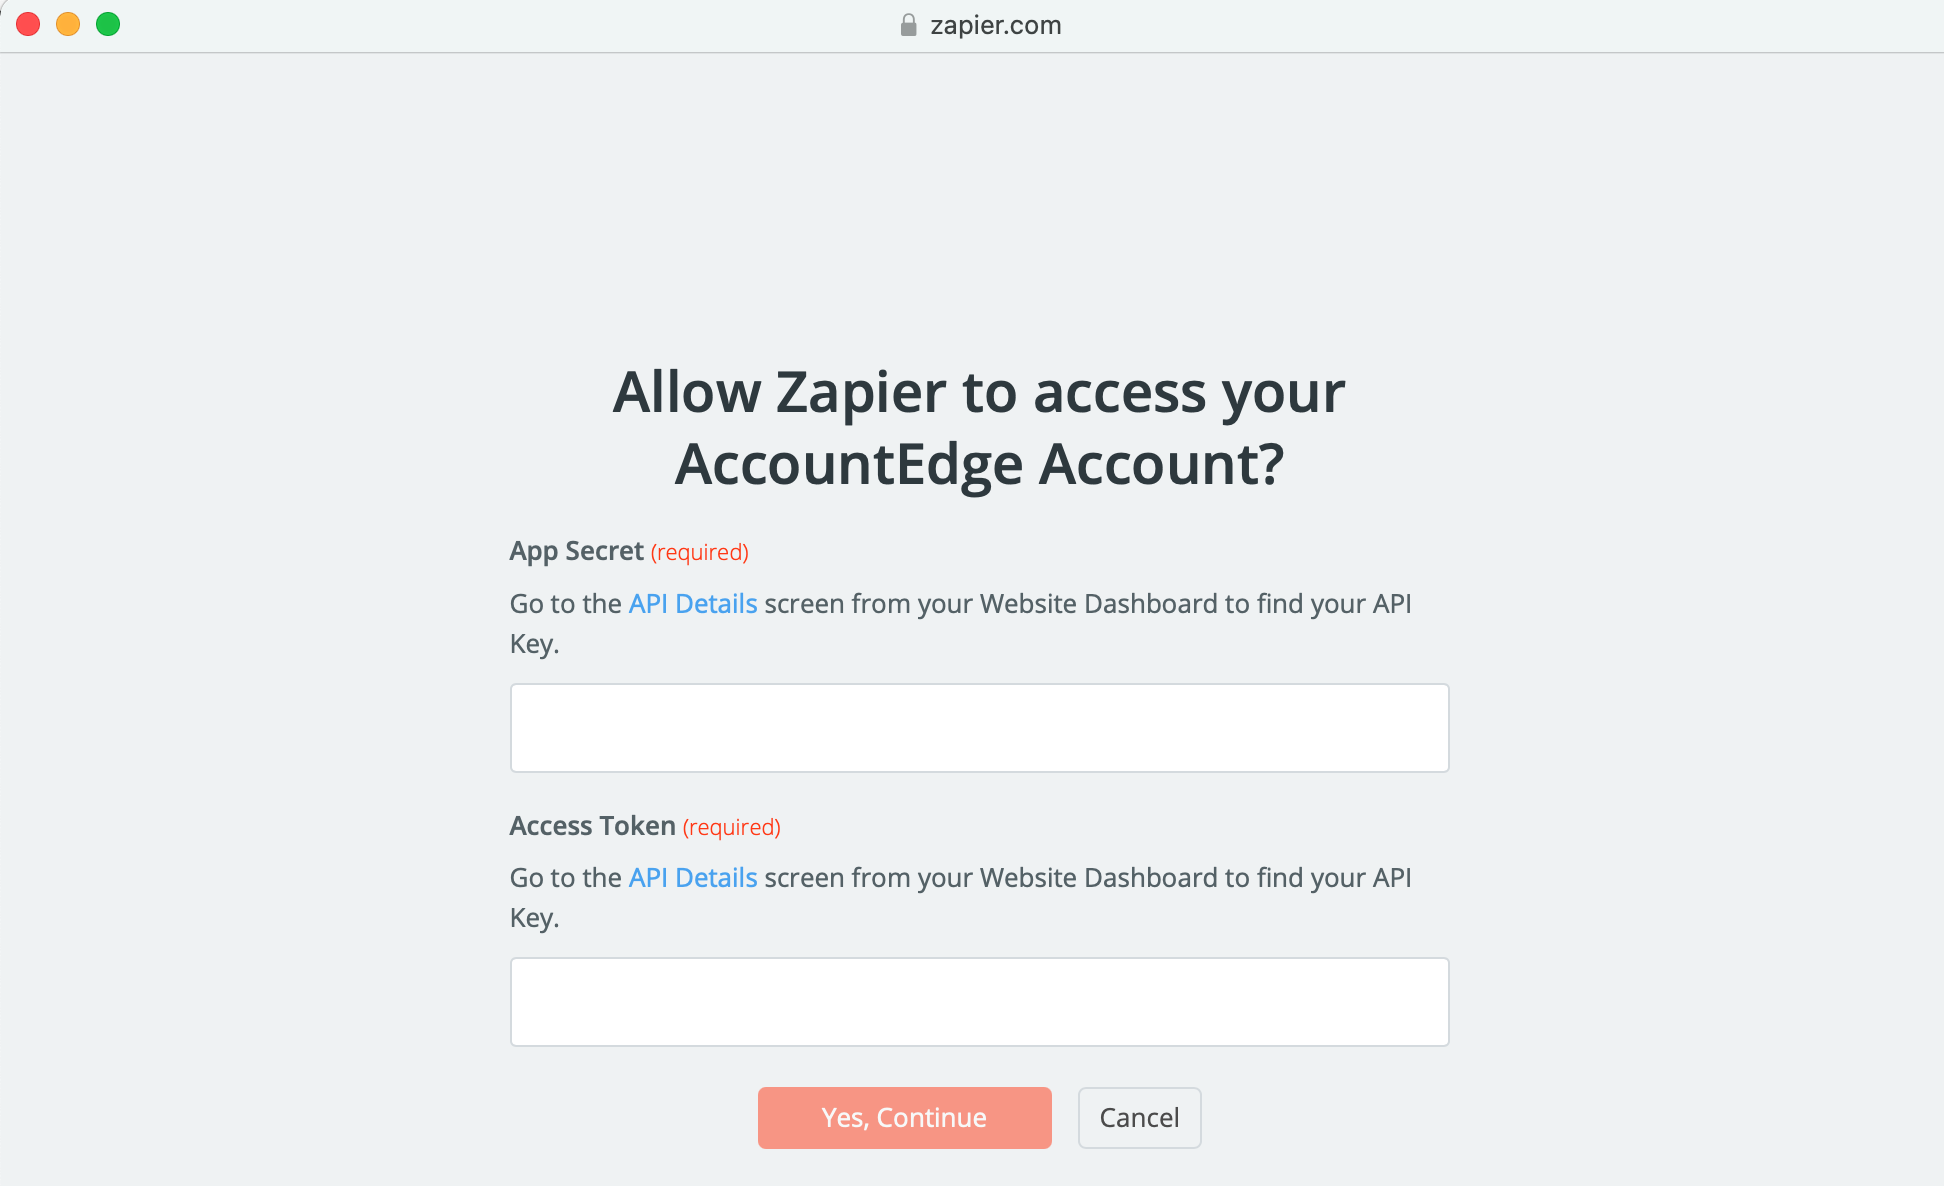
Allow Zapier to access your AccountEdge Account by pasting the App Secret and Access token from AccountEdge Connect.
In AccountEdge Connect, select Welcome>Settings>My Account>Zapier to view your Zapier App Secret Key and Access Token.
You’ll select the icon next to the App Secret Key and Access Token and copy them to your clipboard and paste them into the Zapier window. This is a one-time process for your account, and will permanently connect AccountEdge to Zapier for all your future Zaps.
Select Yes, Continue.
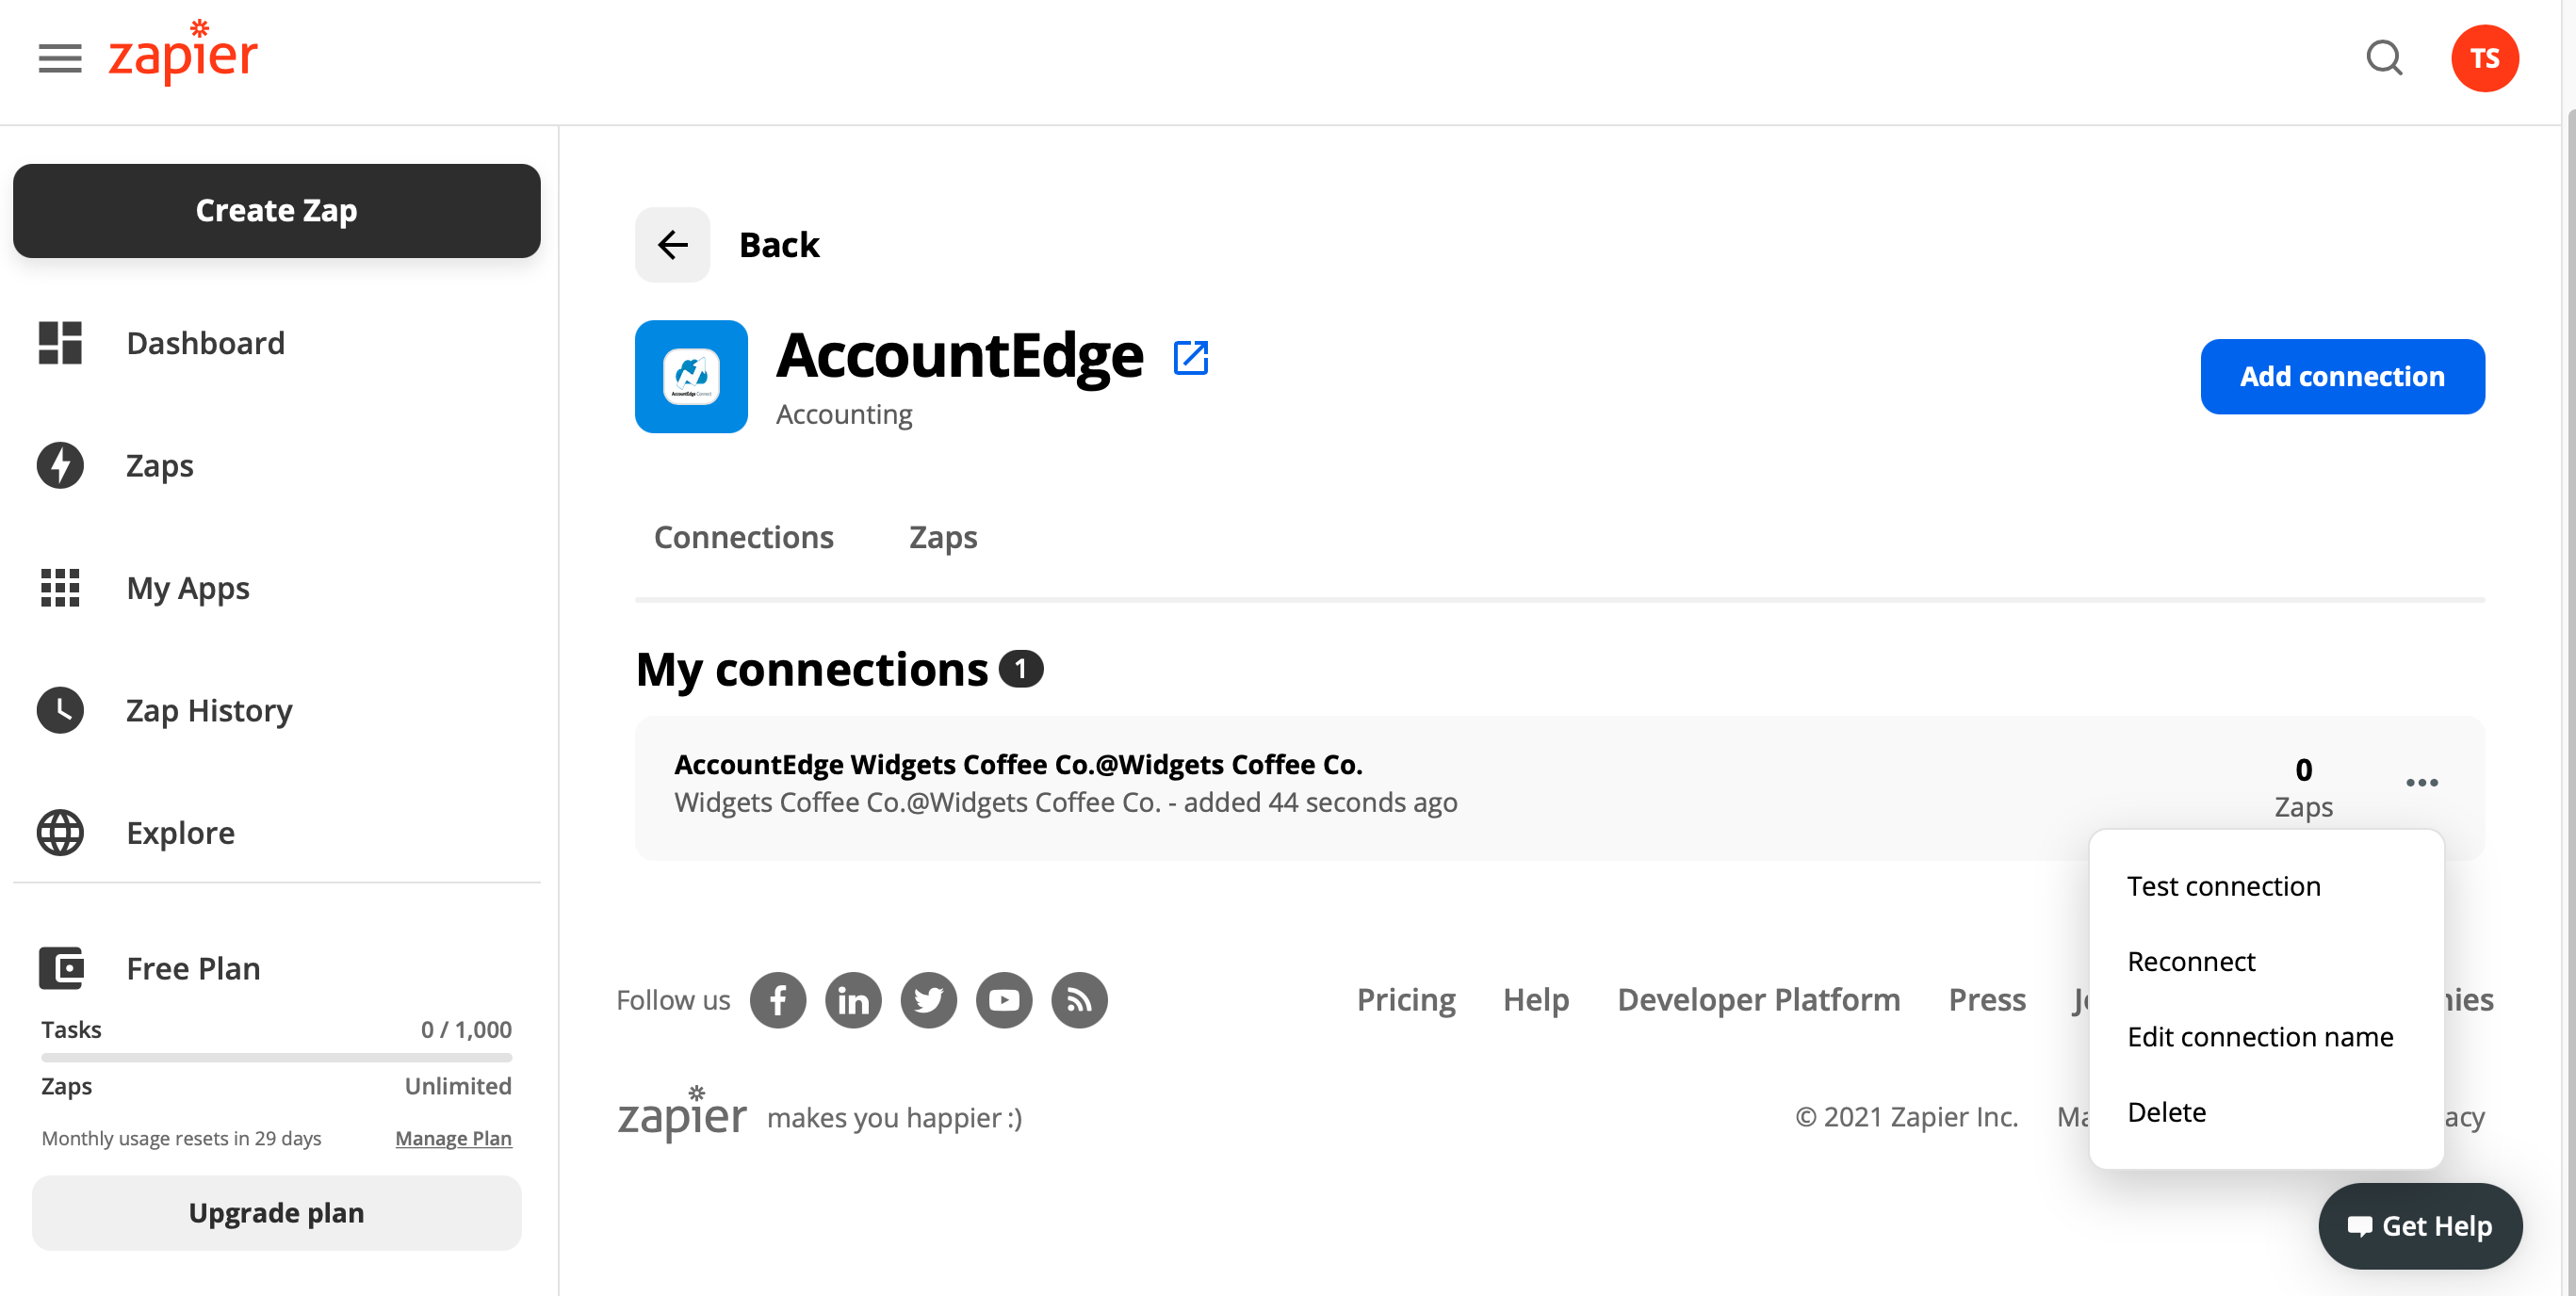
Now that your AccountEdge Connect account is connected to Zapier you can test your trigger and create Zaps to help you create new workflows and share data between AccountEdge Connect and thousands of web apps.
From your Zapier dashboard you can select AccountEdge from your list of Connections and Test the connection, Reconnect, Edit the connection name, or Delete the connection.
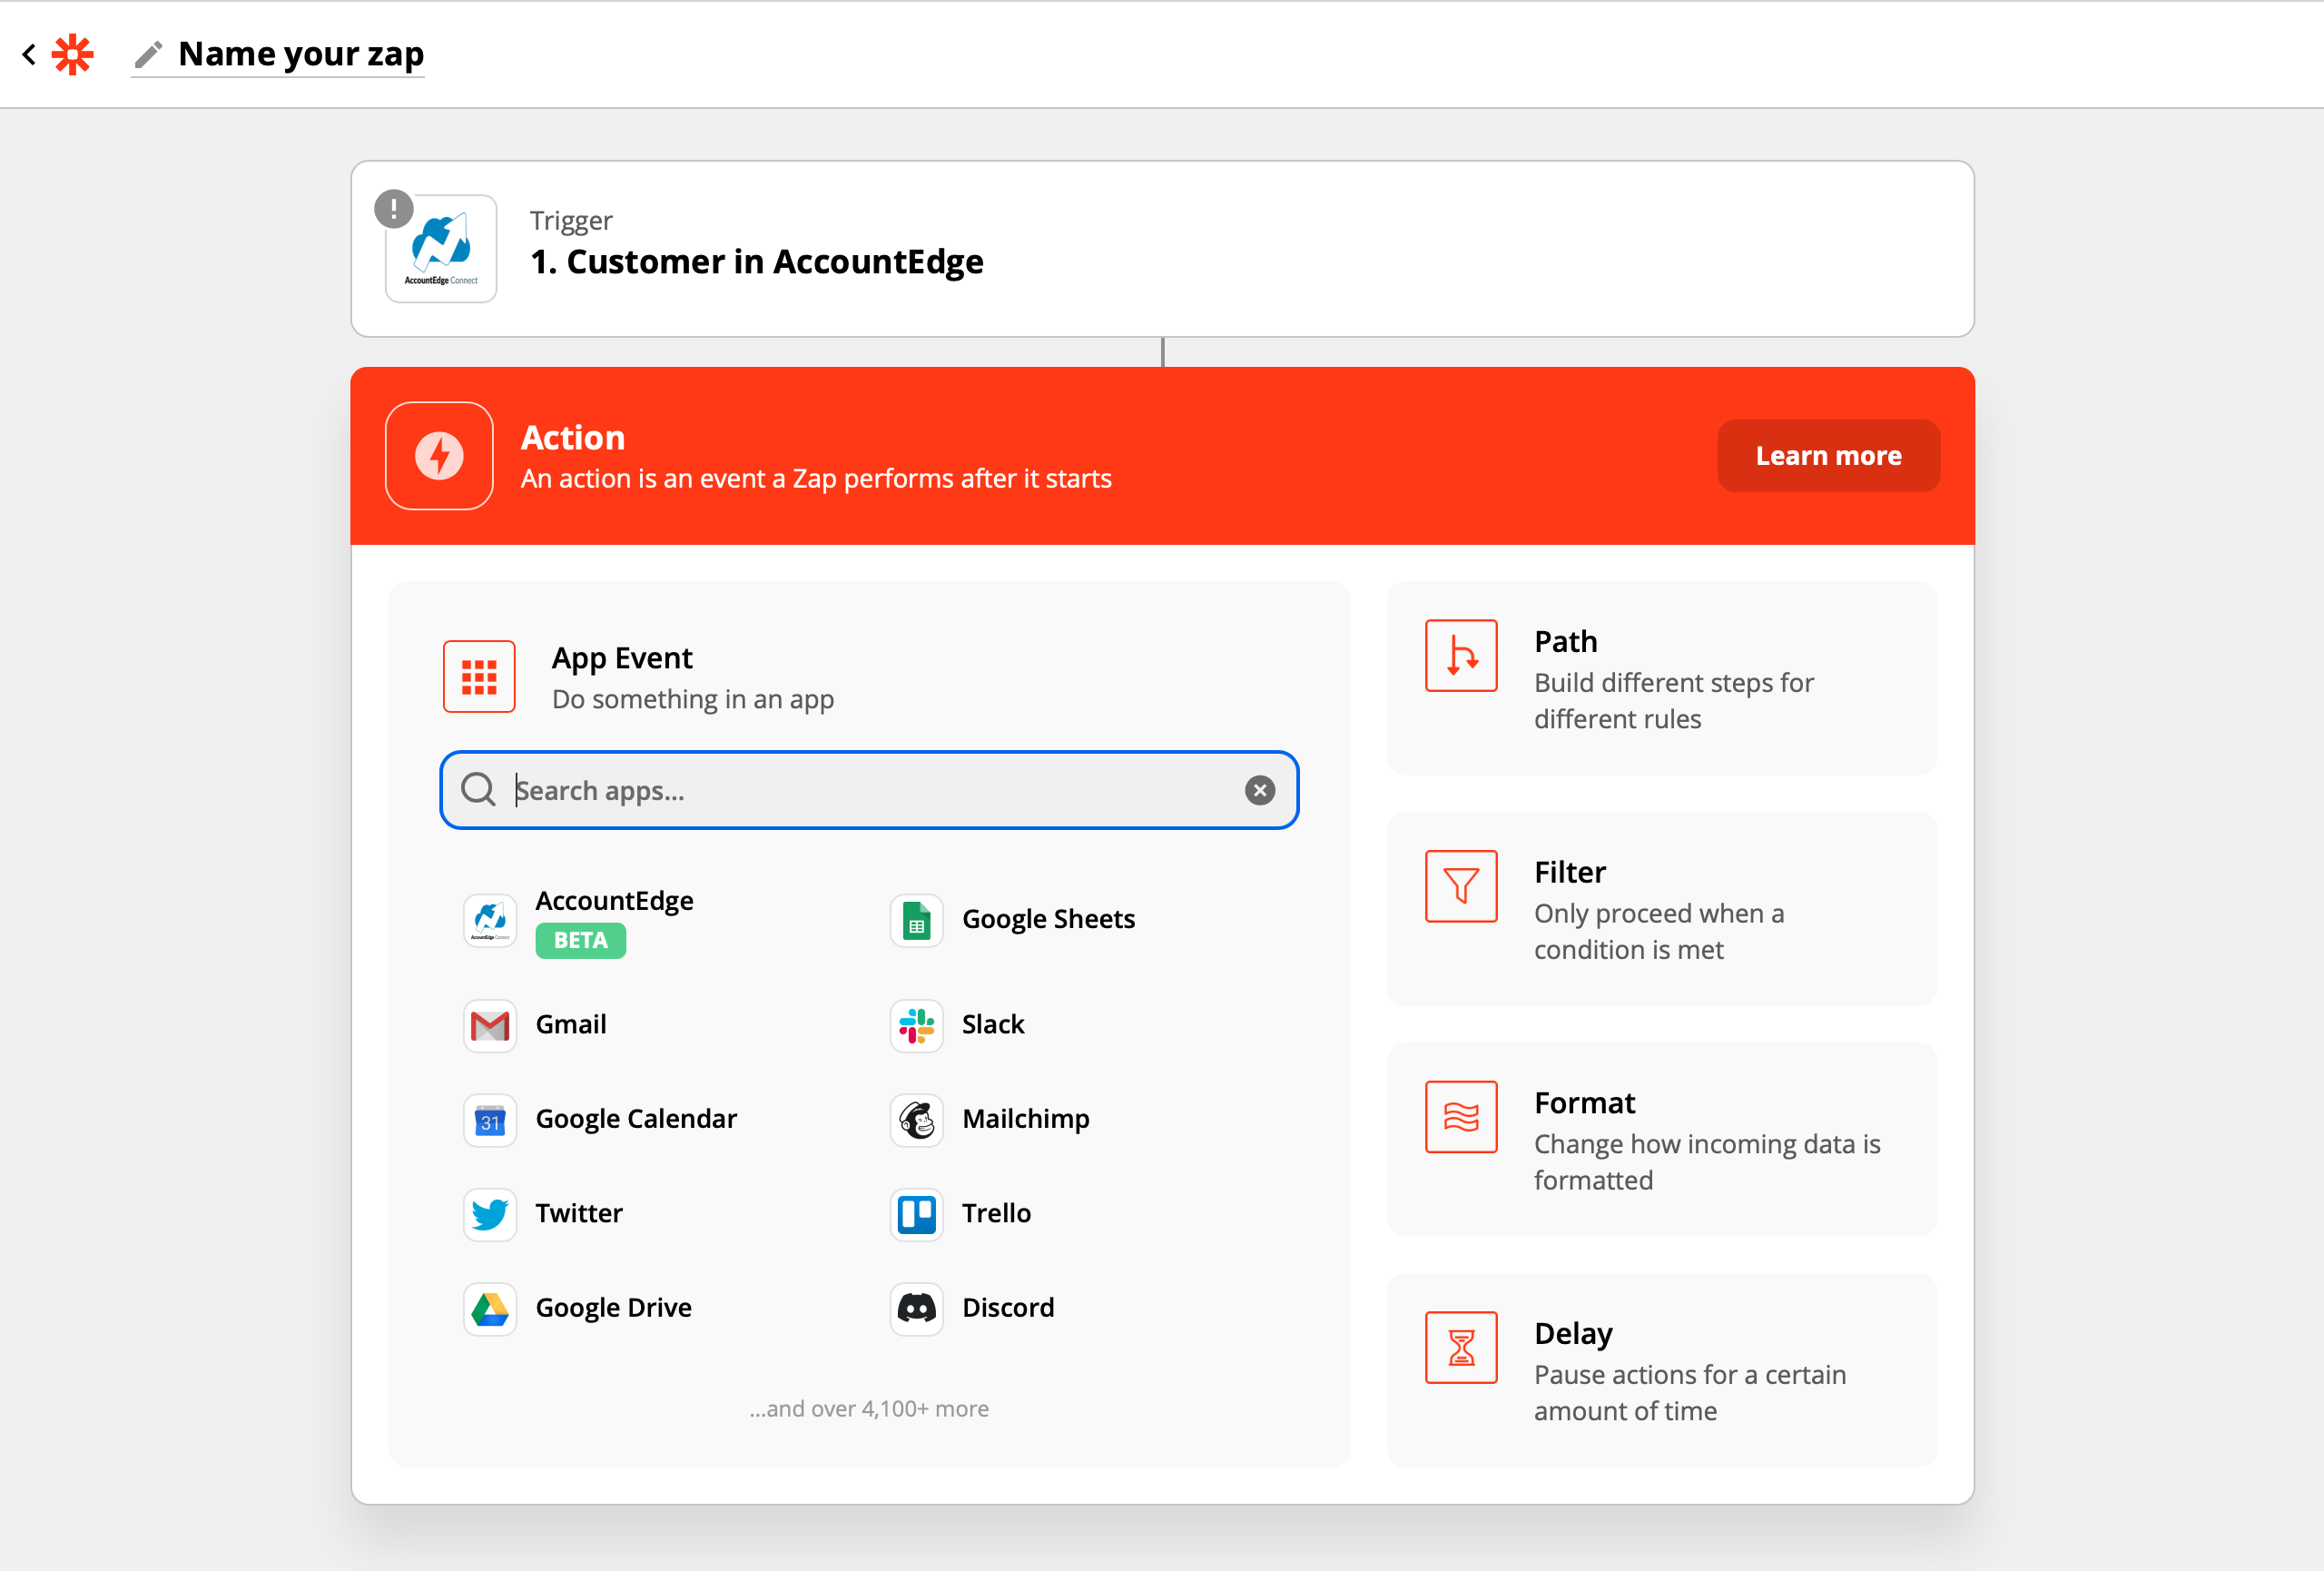
Step 6
Now you are ready to create Actions which is an event a Zap performs after it starts. Select Action and search for the apps to ‘do something’ in. Select an app, for example, Google Sheets.
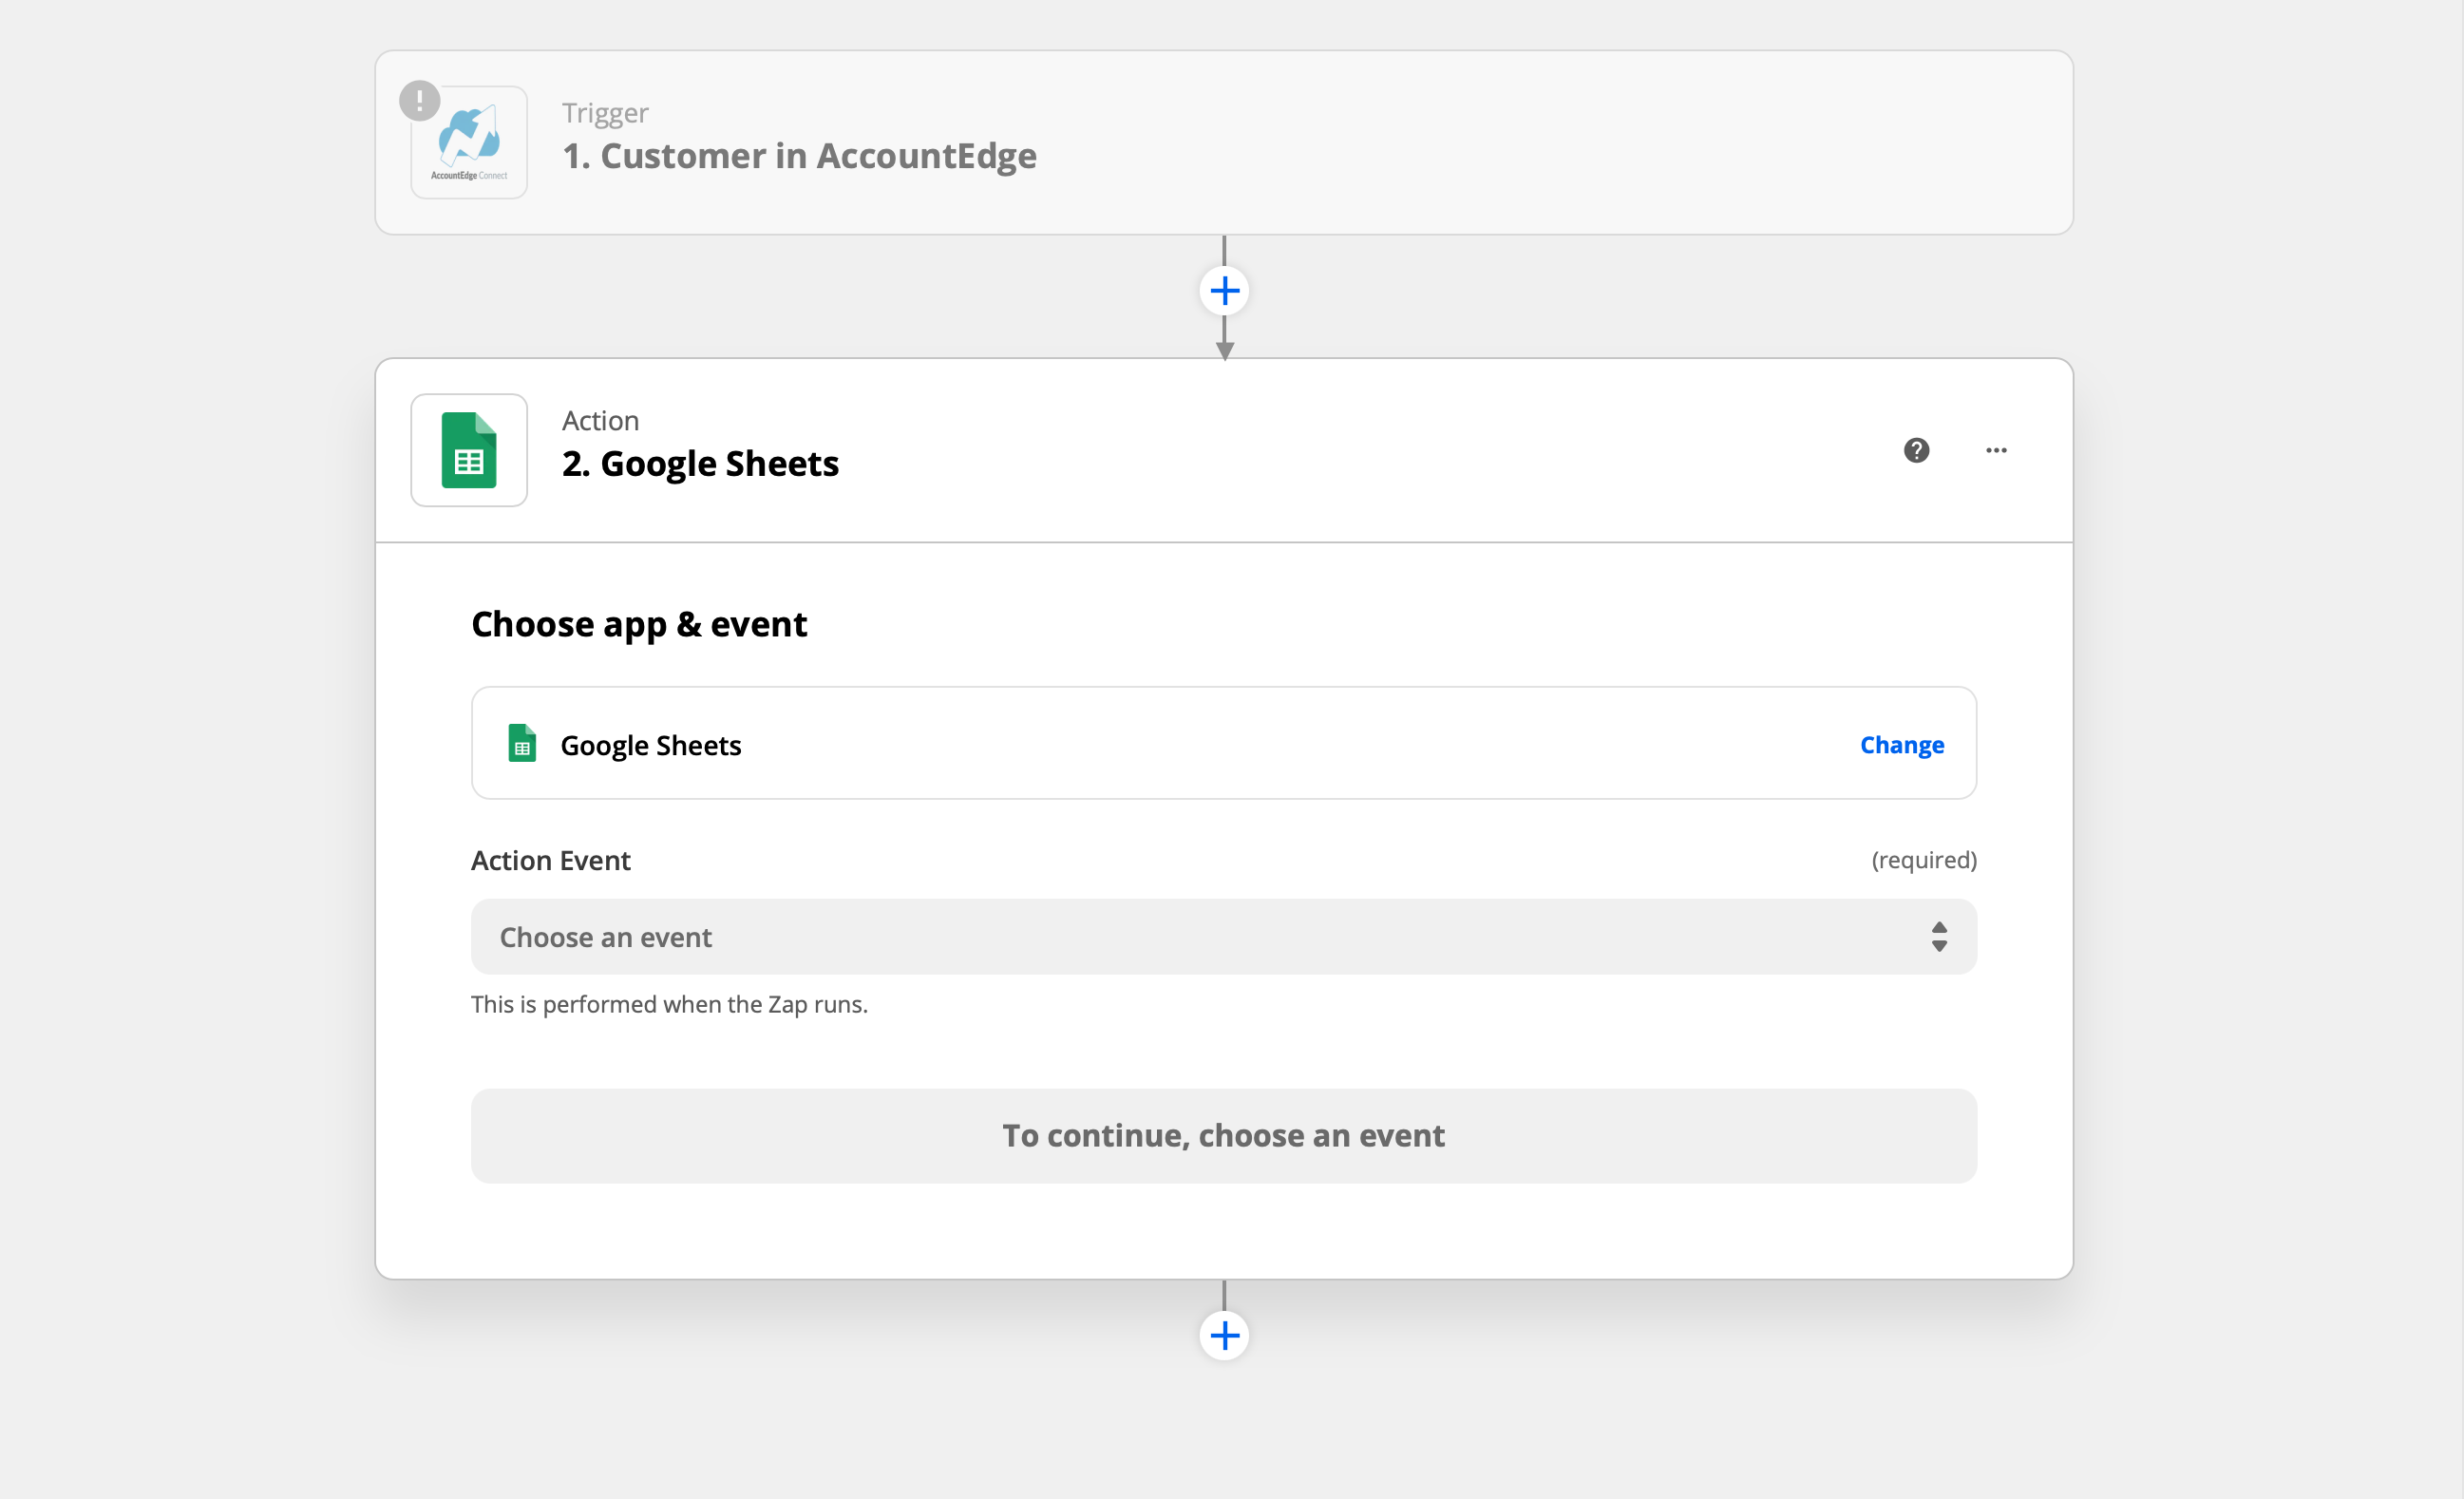
Step 7
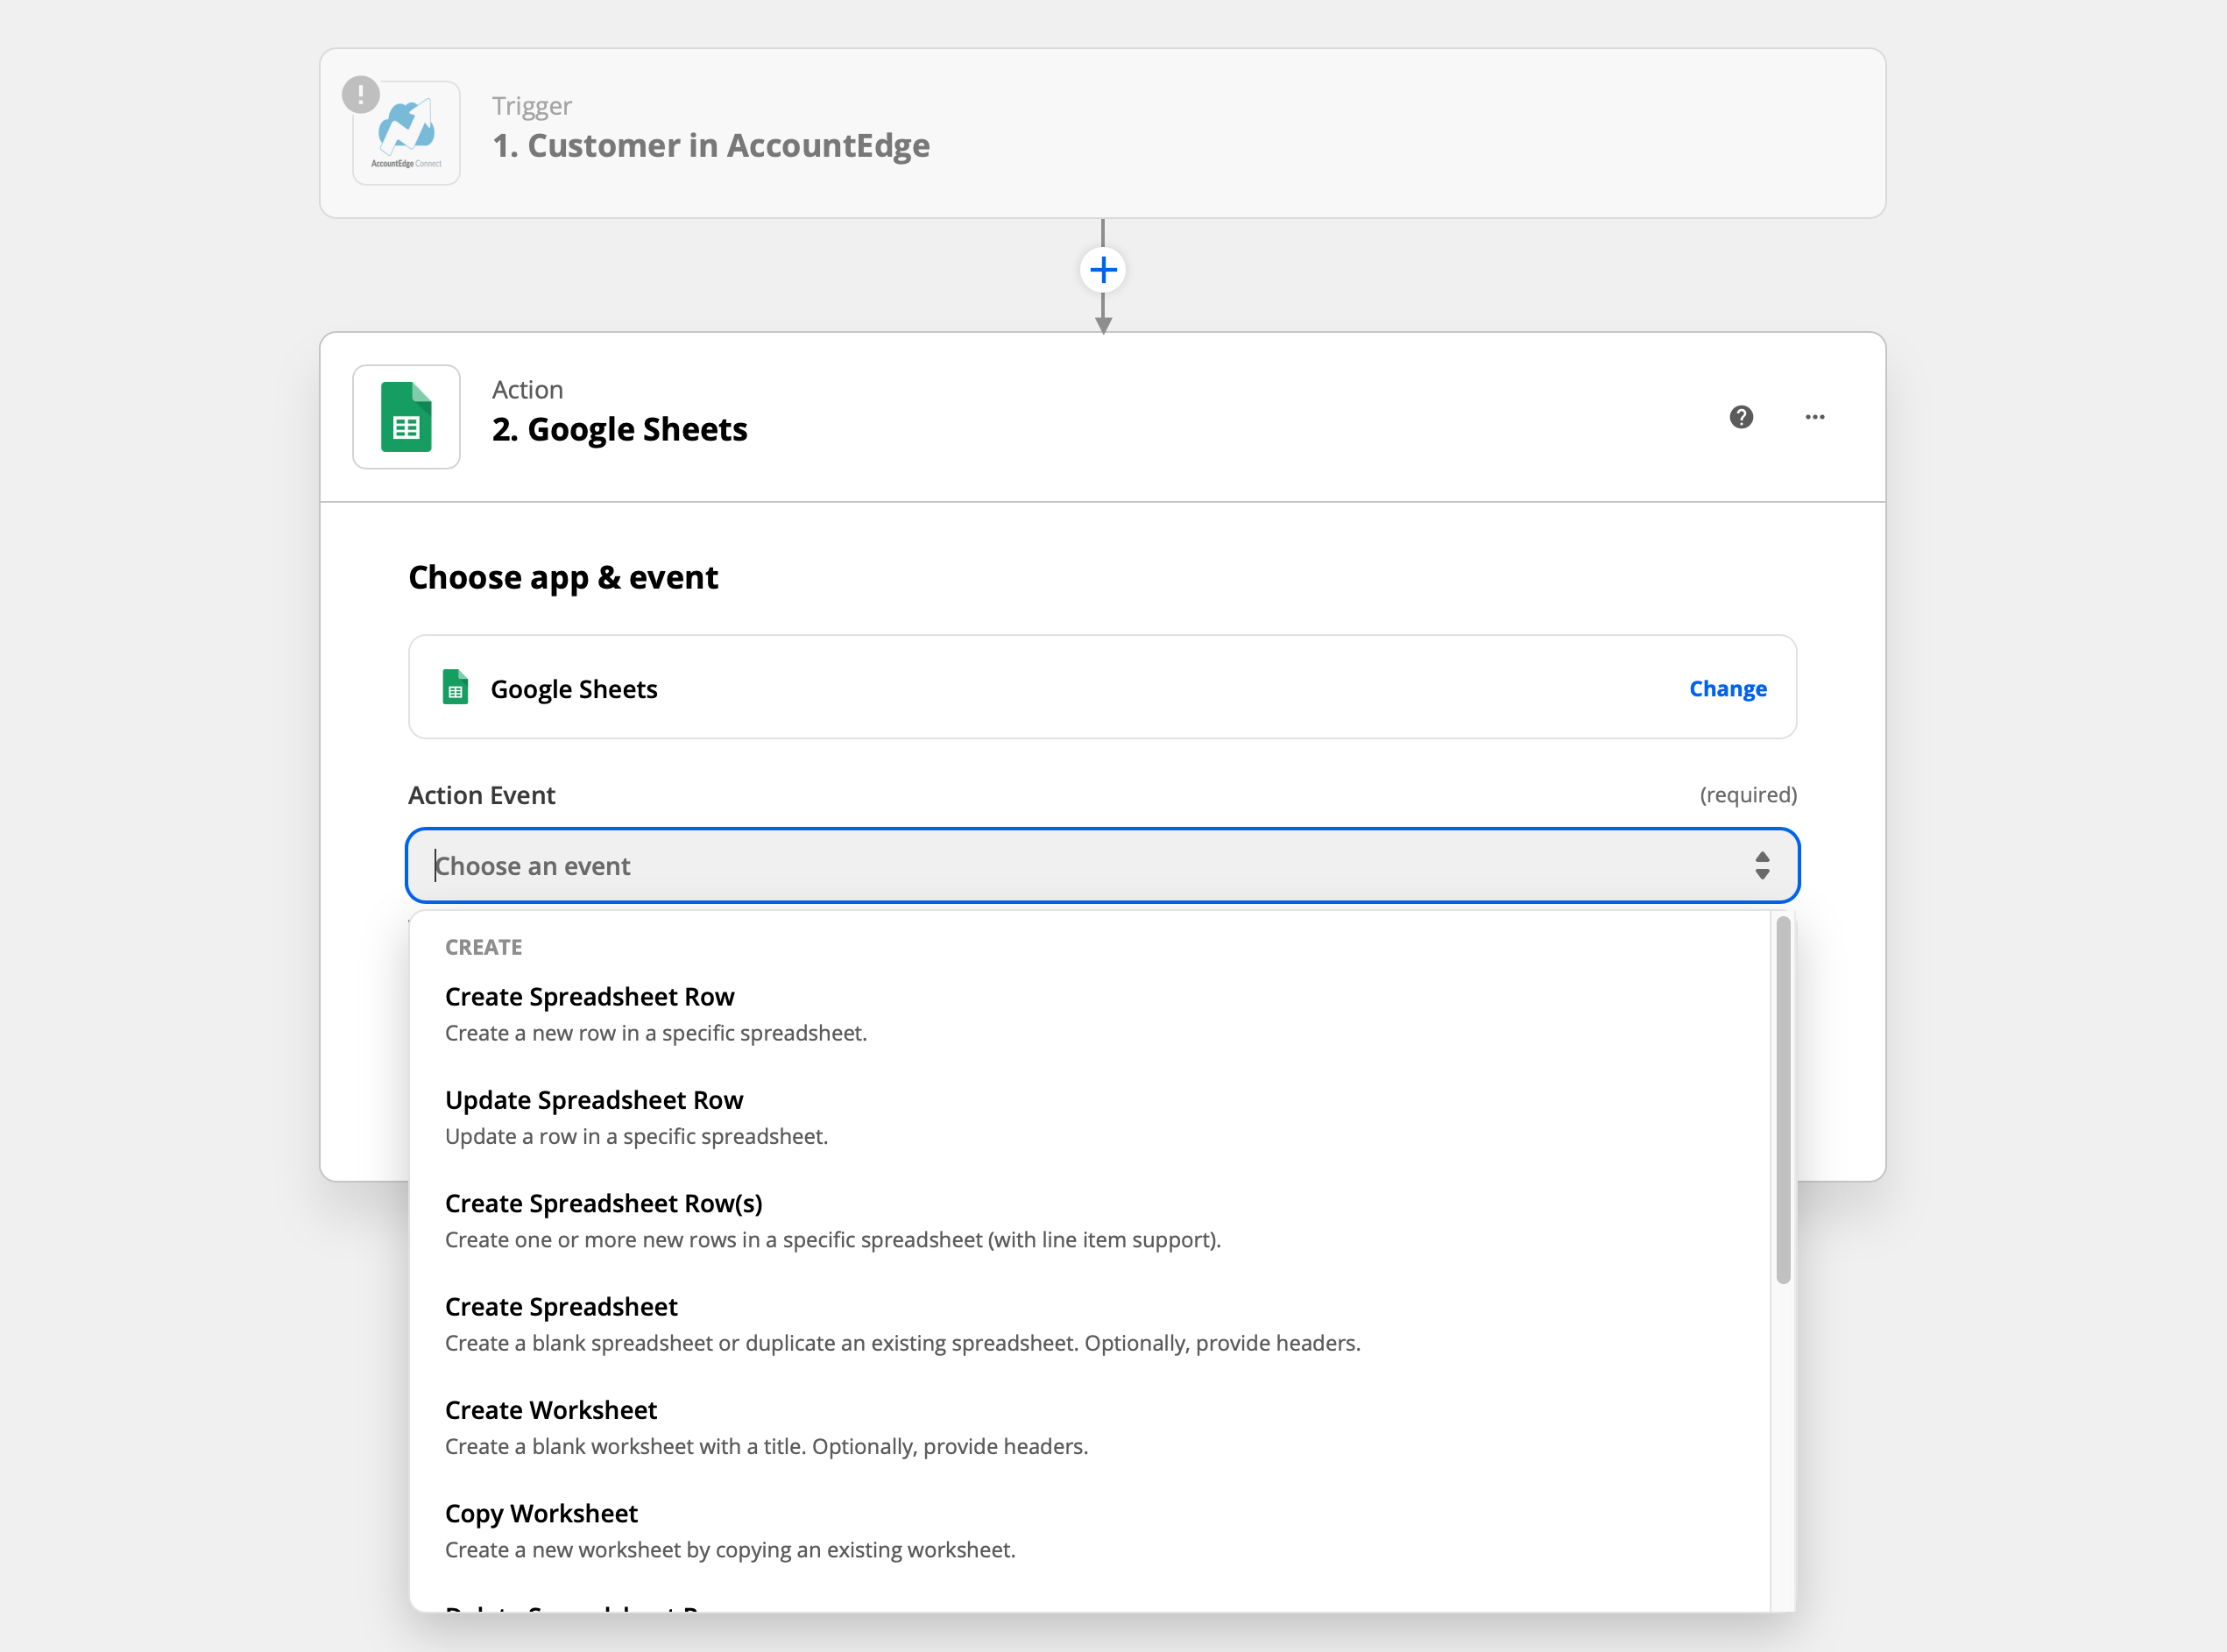
Now select the Action Event you want Google Sheets to perform when the Zap runs.
Now the power of Zapier becomes evident and you can choose an event you want to have happen after your trigger begins.
You will need to sign into the app to give Zapier access, just like you did with AccountEdge Connect when you started. Each apps has its own set up options depending on the app selected.
Be sure to name your Zap at the top of the window for easier access and to turn it on once your satisfied everything is working.
How to Make a Zap
Once your AccountEdge Connect account is integrated with your Zapier account, you can select any other available app when creating a Zap. Here is how to get started:
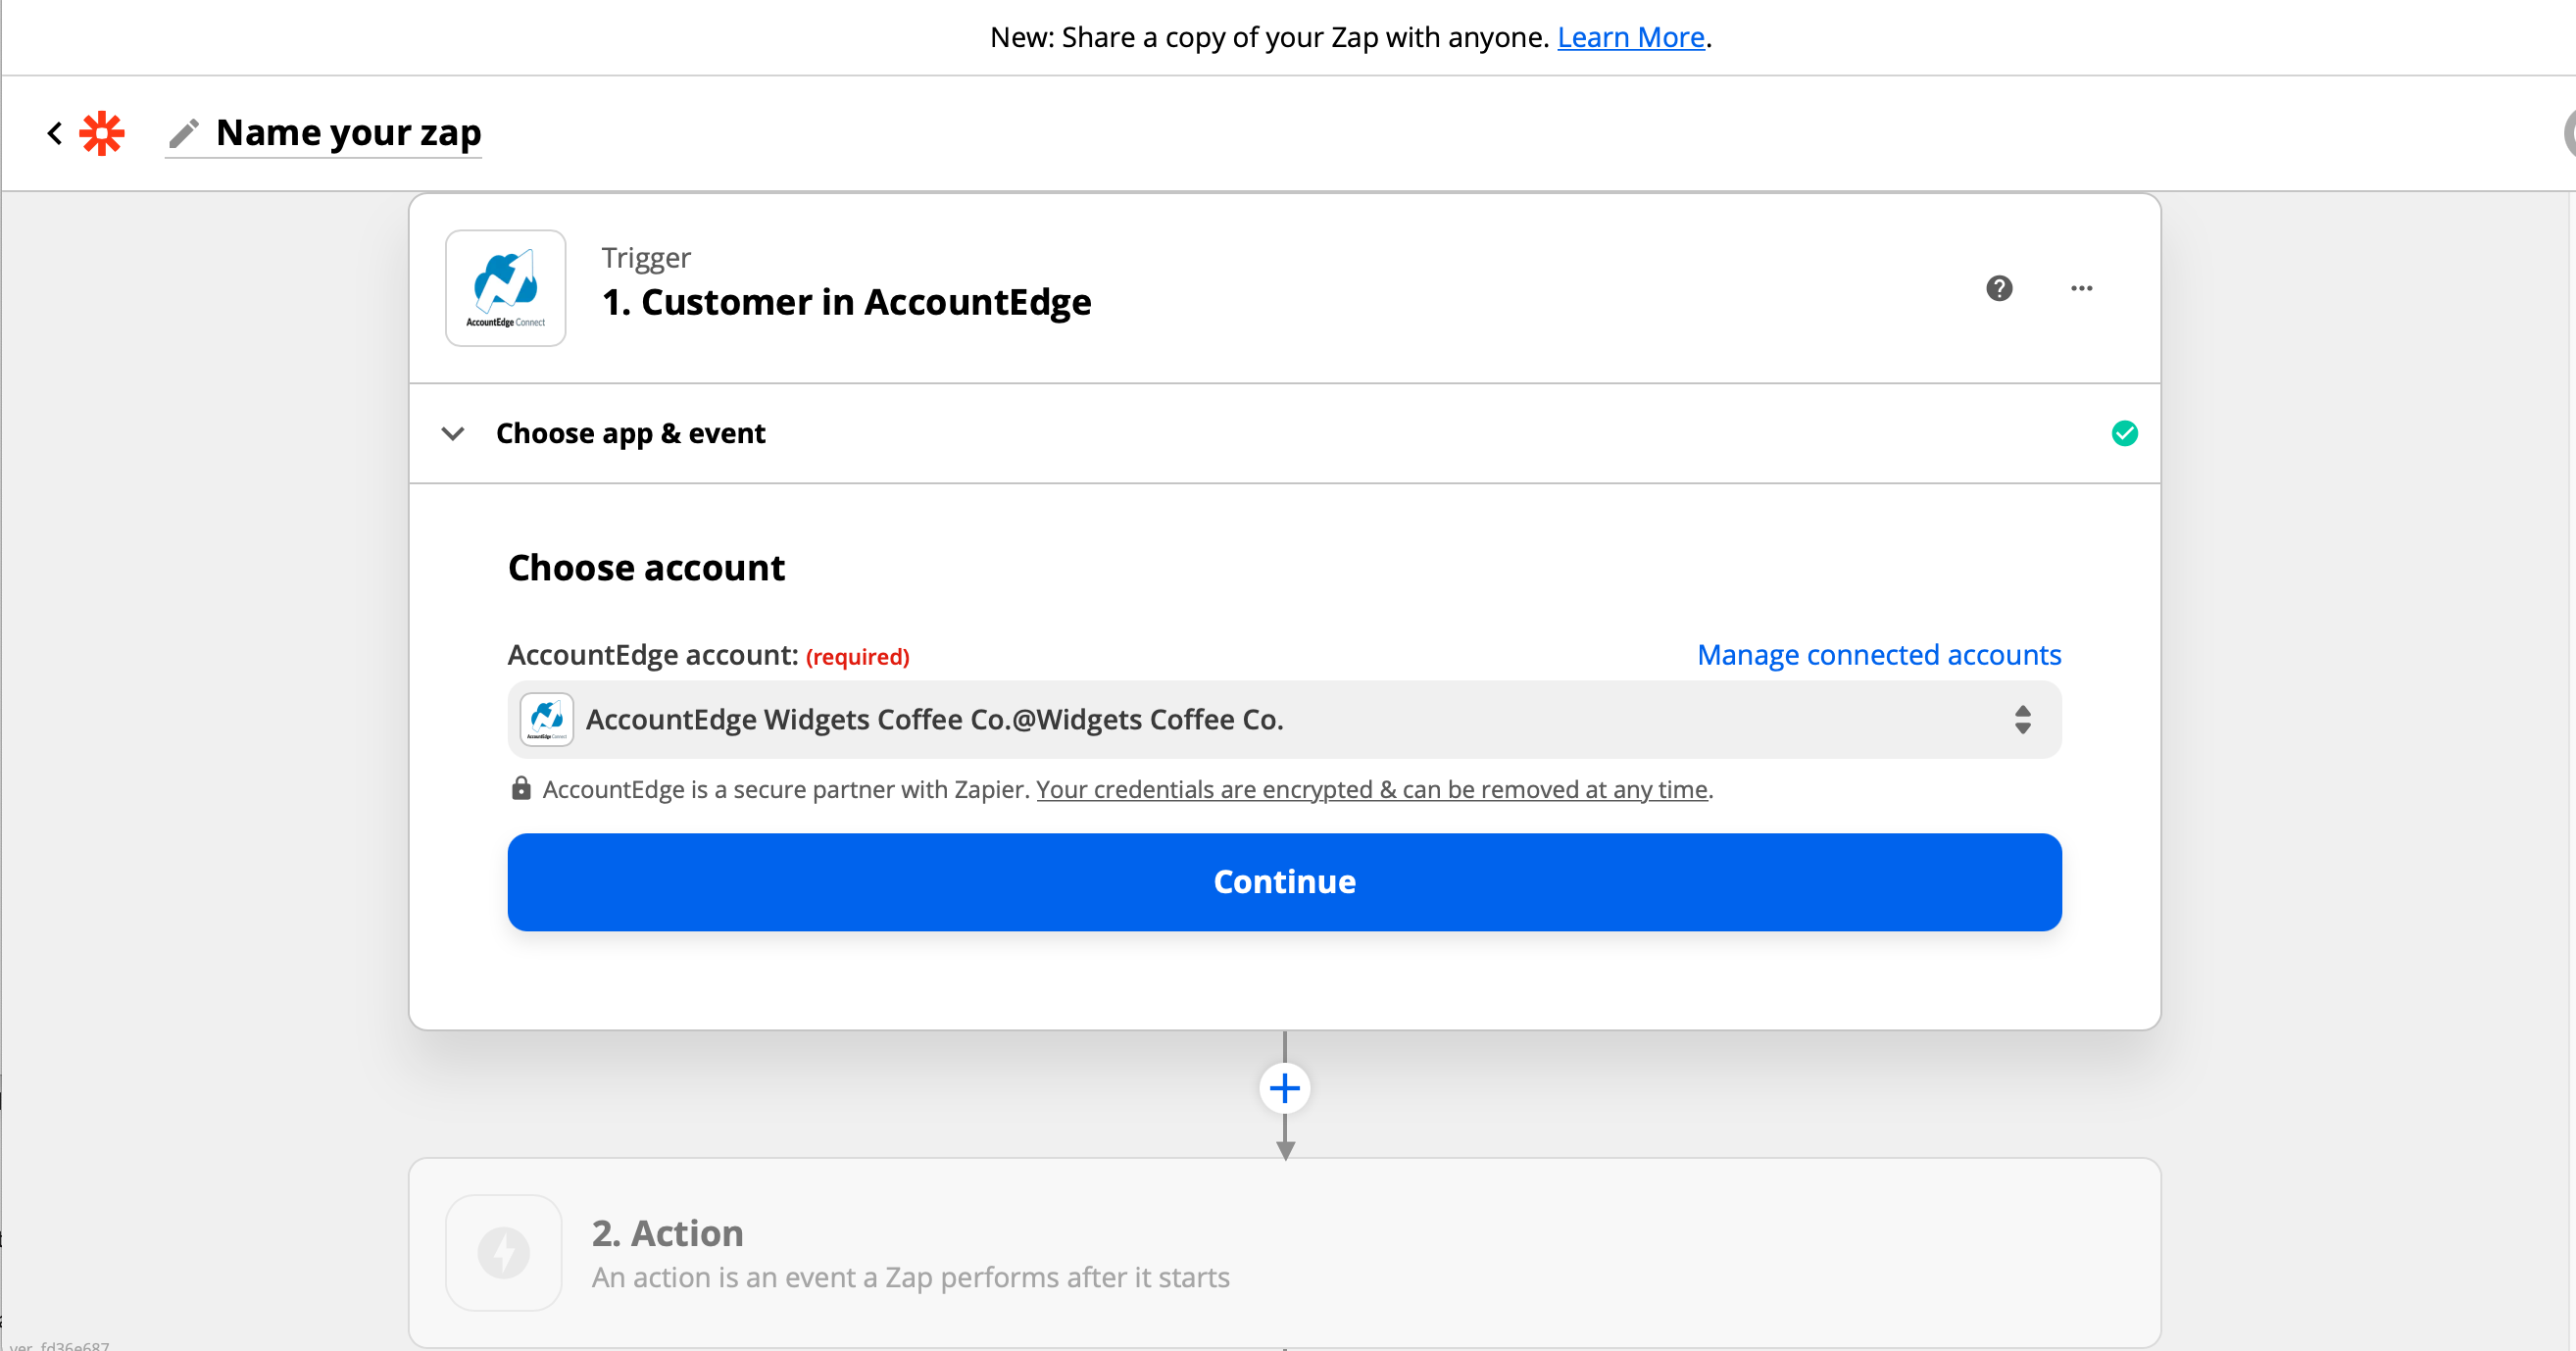
Select Create Zap from your Zapier Dashboard. The first step is to select the Trigger app, AccountEdge Connect. In the Search apps bar, type in AccountEdge, then select it from the search results.
Next, select your Trigger Event, for example Customer (when a new Customer is added), click Continue. Next, select your AccountEdge Connect Account, then select Continue to Test your trigger. You’ll see some sample data based on the trigger type you selected.
Now select your Action, which is an event a Zap performs after it starts. This is using the App you search for in this window, where the action will take place.
How to integrate Google Sheets with AccountEdge Connect using Zapier
Follow the steps above and type Google Sheets into the Search apps bar to select Sheets for your App event to take place.
Choose an Action Event, which is performed when the Zap runs. You can Create or Update Google Spreadsheet Rows or any of the other Create options.
Next, you’ll have to Sign in to your Google account to allow Zapier to interact with AccountEdge Connect. Click Allow. Next you’ll select your Spreadsheet and the specific Worksheet. Hint: If it doesn’t already exist, you might want to create the Google Sheet before you get to this step.
Do you want to sync all unsynchronized activity slips?
Syncing all activity slips will make them non-editable. Be careful
as this action cannot be undone.
We've been working on some new AccountEdge Connect features that are available for your use including Serial Numbers.
In order to activate the features we'll first need to perform some maintenance and refresh some data from Dropbox.
Depending on your company file size, this can a few seconds or a couple of minutes.
0 payment(s) processed successfully, worth $0.00 0 payment(s) failed, worth $0.00 0receipt(s) are now being emailed
To view more info about the payments processed, click here.
This transaction could not be created because the date is set before a Locked Period or before the Current Fiscal Year.
Please either change the date or disable locked periods in your AccountEdge desktop software and sync.
You are about to send out .
Would you like to continue?
Would you like you update your contact record with this state?
Payments cannot be processed because your AccountEdge software has a Locked Period that prevents you from creating transactions before this date.
With Bulk Payments, the date used on the transaction is today's date.
Are you sure you want to cancel ?
All your current changes will be lost.
You must first enable Sales Orders in the Customer Portal settings.
Would you like to do this now?
Are you sure you want to deactivate this customer ?
This operation cannot be reverted back, however you can resend an invite to your customer again.
Before deleting the sale, you must first delete any payments or applied credits linked with this sale.
You're about to send the Expired/Expiring Card Email to this customer whose credit card is either expired or expiring this month.
You're about to send the Declined Payment Email to this customer whose payment was declined while processing.
You first need to enable the Customer Portal. Would you like to do that now?
You first need to enable the Web Pay. Would you like to do that now?
Web Pay requires credit card processing to be set up in settings.
Import Duty and Use Tax can only be used on purchases and vendors.
Would you like to process a Credit Card Payment?
Your request is expired.
Do you want to reload the Credit Card Authorization form again?
This feature is not yet available for your version of AccountEdge.
This feature is available for users running AccountEdge 2017.
If you are on an earlier version, you will need to upgrade to the latest release. If you're already on the 2017 version, please make sure to install the latest update.
Changing the payment method will remove your stored details.
In order to create a new job for this customer, you must first save this new customer’s details.
Would you like to save this customer and continue to create a Job?
Changing the currency will erase all line items.
Do you want to continue?
You have selected a lead.
Sales must be associated with customers. Would you like to convert this lead into a customer and record the sale?
Changing this customer's email address will not change the email address they use to log into the Customer Portal.
You can change that email address on the customer record under Selling Details.
This customer credit limit of XXX has already been exceeded by XXX.
Do you want to continue with this sale?
This sale would increase the customer's balance over their credit limit.
Customer Balance:
Credit Limit:
Sale Total:
Over Limit:
Would you still like to create this sale?
You cannot change Contact type of this record.
This record has either already been synced or has transactions associated with it.
However, you can change contact type from your AccountEdge.
The shipping method cannot be changed. Invoices with UPS Shipments must use the UPS integration shipping method.
Invalid Currency Code
is not a valid currency code.
Do you really want to leave this page?
Click Cancel to stay on this page. Click Discard to leave this
page or click Save as Draft to save your work for later.
Note: Transactions saved as draft will not be synced to AccountEdge
You cannot delete this record.
This record has either already been synced or has transactions associated with it.
In order to use the Bulk Payments feature you will need to set up Merchant Account processing found under Settings.
We couldn't reach Dropbox to refresh your lists. We'll refresh your lists the next time you log in.
Please try to relogin after sometime.
Would you like to set this account as the default account to use on future transactions for this contact?
You do not have sufficient stock for the following items:
Would you like to save this as an Order anyway or Cancel and edit the sale?
Would you like to remember this setting for this customer for future sales?
Your AccountEdge Connect account and company file has been upgraded.
Please log out and back in again to refresh your account.
You have edited a time sheet. Please choose Save Draft, Record or Continue Editing.
You're about to send the Expired/Expiring Card Email to all contacts in this list that have expired cards or are expiring this month.
You're about to send the Payment Declined Email for all sales that have been declined in this list.
You have selected to process payments for Invoices.
Each credit card payment will take approximately 6 seconds to process. If you have a large number of payments, feel free to close this window after clicking Continue. The payments will process in the background. You'll be notified of their completion when you next visit the AccountEdge Connect Bulk Payment window.
Click Continue to process payments or Cancel to change your selection.
Was a separate payment manually created in your AccountEdge software?
If NO, we'll remove the payment and reset the balance on the related invoice(s) to be opened.
If YES, we'll remove the payment but leave the balance on the invoice as is.
Note:Deleting a synced payment removes it from AccountEdge Connect. It will not remove it from your AccountEdge company file.
Deleting a synced transaction removes it from AccountEdge Connect. It will not remove it from your AccountEdge company file. Click Delete again to confirm.
Marking a transaction as synced will prevent the transaction from being sent to your AccountEdge Company file when syncing. Keep in mind that by doing this, your transactions in AccountEdge Company may not then match the transactions and totals in AccountEdge Connect.
Marking a payment as synced will prevent the payment from being sent to your AccountEdge Company file when syncing. Keep in mind that by doing this, your payments in AccountEdge Company may not then match the payments in AccountEdge Connect.
Password for Access:
This sale has an unsynced payment associated with it. You will first need to either void, delete the payment or mark the payment as synced.
Marking a payment as unsynced will send the payment to your company file during your next sync. Be sure to check your company file to make sure a duplicate wasn't created.
Marking a transaction as unsynced will send the tranaction to your company file during your next sync. Be sure to check your company file to make sure a duplicate wasn't created.
AccountEdge Connect
Hi Friend,
Are you still there?
Invalid Password
You're using an older version of AccountEdge Pro.
AccountEdge Pro and AccountEdge Connect have been updated for better handling of syncing of data and addressing some known syncing defects. It's recommended to install the latest update AccountEdge Pro 2019 r23.0.13 or later.
 Select Yes, Continue.
 From your Zapier dashboard you can select AccountEdge from your list of Connections and Test the connection, Reconnect, Edit the connection name, or Delete the connection.